Using a Grind Gage for In-Service Grease Analysis
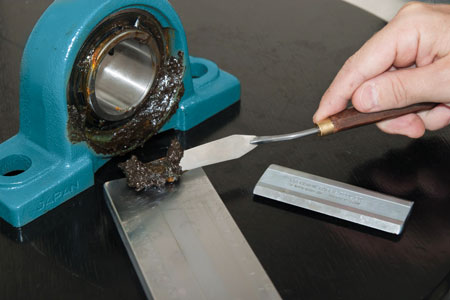 Oil analysis is commonly used across industry not only to analyze oil health but also machine health. Recently, advances have been made in grease analysis. With the increasing demand for machines to operate fault-free, it has become even more critical to understand what is occurring inside of them. Although technologies such as vibration, thermography and motor-current analysis can offer early signs of machine failure, analyzing in-service oil and grease can help refine your detection ability.
By periodically sampling the oil in a machine, you can obtain information about its health. The same is true for grease-lubricated components. With 90 percent of bearing applications being grease lubricated, it makes sense to apply the same methodology for analyzing the lubricant in these cases.
The value of grease sampling has been recognized and is now even an ASTM standard (D7718-11). This standard describes a method for taking a representative grease sample from an in-service bearing. While this is the first step in grease sampling, the second phase involves conducting tests on the sample.
Several laboratories can perform grease analysis and check for contamination, changes in viscosity or consistency, as well as test other properties of the grease and its constituents. Some of these tests can be expensive and may take several days before results are received. This has created a need to analyze in-service grease in the field and obtain instant feedback on condition, contamination and wear debris content.
A study published by SKF indicates that roughly 70 percent of bearing failures are due to contamination. Another study by NSF found that contamination caused nearly 50 percent of bearings to fail. By applying the Pareto principle (the 80/20 rule), you can see that addressing contamination in bearings should prevent some if not most failures. Accessories such as shields and bearing isolators can be added to make bearings last longer, but you must be able to analyze the amount of contaminants in the lubricant to know how clean or dirty they are.
Field tests for oil analysis are readily available for almost any property you want to test, including acid number, viscosity, water content, etc. While there are some field tests for greases, they are primarily limited to rough estimations of consistency and oil content. Whether in the field or lab, few practical methods of analyzing particle concentration exist for in-service grease. In fact, there are only three methods available: microscopic analysis (FTM 3005.4), scratched acrylic plates (ASTM D1404) and fineness-of-grind gages (Hegman gages). This article will discuss the fineness-of-grind gage as a practical tool for both lab and field applications.
Gage Design
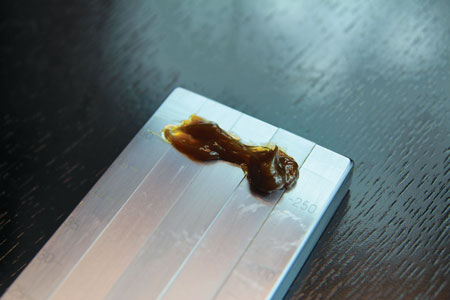 The gage’s design features a large block of steel (typically stainless or chromium plated) and tapered grooves or “raceways” machined into the surface. One groove may range from a depth of 0 to 250 microns, with a second groove from 0 to 50 microns.
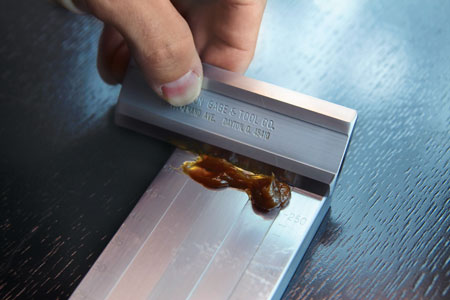
A wiper blade is fabricated from the same material as the block. It draws the sample across the block’s surface for analysis. The wiper blade and the surface of the block are milled as smooth as possible to allow for zero clearance between them during the testing process. After many uses, the wiper may lose its profile and may need to be retooled.
Applications
 Early applications of these gages were seen in the pharmaceutical and paint industries, which had issues determining the fineness of particles in suspension. For example, in the paint industry, the earliest method for inspecting dispersion quality involved obtaining a small sample of the product to test for particle fineness. Testing in this manner had its drawbacks because it required considerable experience and agreement between testers to predict the final product quality. To assist testers in determining dispersion quality, the North Standards were developed. These were actual pigment dispersions covering a broad range of grind quality. A sample was checked by comparing it to the selected standard on a glass plate.
In order to eliminate the dependence on standard samples, the Hegman grind gage was developed in 1938. It is now used in a variety of fields, including the food, pharmaceutical, pigments, plastics and paint industries. In all of these applications, Hegman gages (sometimes referred to as grind gages or grindometers) are utilized to produce, store and apply dispersion products.
 Using the Gage
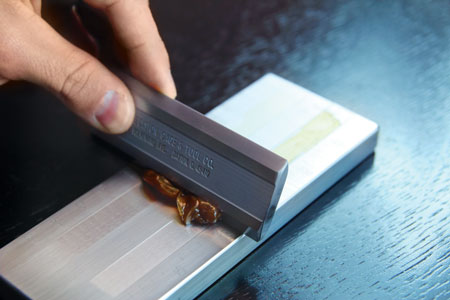
To use the gage, start by placing the device on a flat surface. This will allow even pressure to be applied on the wiper blade during the testing process. Spread the grease to be tested on the deep end of the channel and be sure to use enough grease so that it can be distributed evenly over the length of the block. Hold the wiper blade perpendicular to the block and pull the blade down the length of the channels with a smooth, even stroke. Once the grease has been spread down the channels, hold the block at an angle to a light source to check for particle concentration and type.
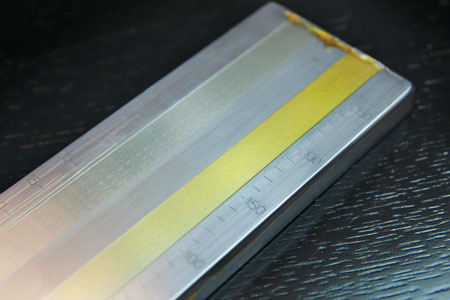 Not only does this field test provide a way to quantify particle concentration in grease, but it also offers a crude indication of particle size. When the test has been completed, inspect the channels for streaks left behind. Where the streaks begin relative to the depth of the channel will give you an estimation of the particle size.
In a recent experiment, two tests were conducted: one with new grease applied directly from a grease gun and another test with in-service grease taken from a wheel bearing. When the results were compared, a few differences were observed, including the amount of streaks found in the samples. The new grease spread evenly down both channels with little to no streaks, indicating no hard particles in the grease. On the other hand, the used grease sample showed obvious signs of hard contaminants.
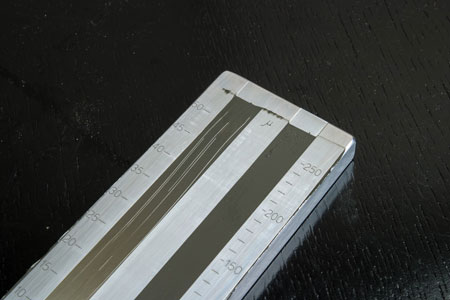
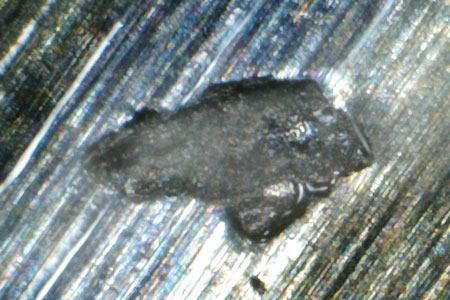
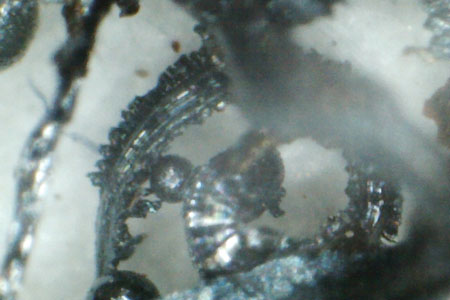
Although knowing the size and concentration of particles suspended in grease is beneficial, this test can be taken a step further to analyze the particles and identify the contaminants. By looking at the particles under a microscope, you can begin to distinguish environmental contaminants from wear debris originating in the bearing/race/cage assembly. These findings can then be used to determine wear patterns and modes as well as give feedback on any contamination control devices being utilized.
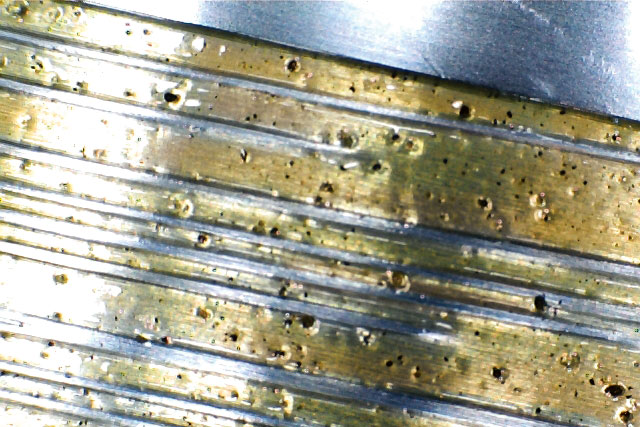
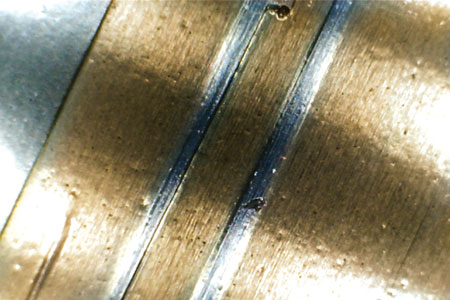
This test offers the most information on grease that has been directly purged from the bearing’s core. If the grease can be sampled, either through a grease purge trap or a grease sampling device, it will provide direct information on the current state of the grease in the bearing. However, dry, old grease that is simply scraped from the shaft/seal interface will have more ambient contamination (airborne particles), making it harder to obtain any current information about the state of the bearing. This type of grease is historical data from the bearing and doesn’t represent what is happening currently.
Be sure to conduct this test on new grease to find out what its “streak” profile looks like in the raceways. Keep in mind that some solid additives such as graphite, moly, etc., may appear in both new and used grease samples and should be accounted for when evaluating a sample’s total contamination.
As the demand increases for machines to operate without failure for longer and longer periods, the need for accurate information on the operating condition of these machine parts will continue to become more important. This simple test should not be used to replace laboratory testing but rather to supplement it and provide more immediate information.
References
Doubleday, D. & Barkman, A. (1950). Reading the Hegman Grind Gage. Paint, Oil and Chemical Review.
Lafferty, G.J. & Gross, H.M. Application of the Hegman Gage to Medicinal Particle Fineness in Ointments. Journal of the American Pharmaceutical Association, Vol. XLIV, No. 4.
