ASTM Enhancements to Microscopic Particle Identification and Documentation

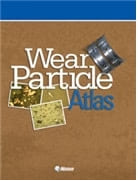
In 1982, Daniel Anderson published his influential book, Wear Particle Atlas, which describes, sizes, and classifies particles found in oil.
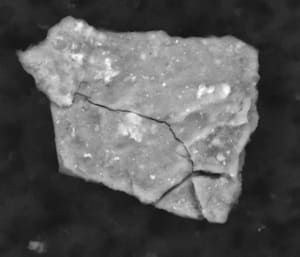
The particles of greatest importance are wear metals, although other particles, such as fibres and foreign materials, are also identified.
 Still widely referenced today, Wear Particle Atlas serves as a foundational reference for the various wear particle techniques currently being developed. This includes both microscopic and digital approaches.
Microscopic particle evaluation requires that particles are deposited onto a static surface and inspected with a microscope. Digital particle identification techniques measure pixels associated with the particles, which are dynamically measured as they flow past a detector array.
The American Society for Testing and Materials (ASTM) is actively involved in developing standards to improve the value and utility of both approaches.
Microscopic Evaluation of Wear Particles
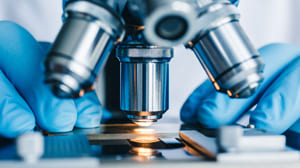
 Using a microscope to inspect particles extracted from oil samples is a powerful and universally used advanced oil condition monitoring technique. As ASTM standardized this, it found that the classification and identification of particles were not uniformly applied by the end-user community.
As a result, ASTM D7684 was written to standardize the terminology and description of particle shapes, textures, and colours. ASTM D7670 (membrane filters) and D7690 (Ferrography) were written to support test methods that can be used to separate and deposit the particles from the oil onto patch or glass substrates for visual analysis.
While this technique is widely used, there are several problems with this long-standing and trusted method. Microscopic evaluation of particles requires a trained and experienced eye. Knowledge of both particle morphology and machine metallurgy is a requirement for properly executing microscopic particle evaluation.
Adding to the subjectivity of this method, microscopic particle inspection reports are not standardized. Many organizations have processes that produce a report based on a single sample that addresses various particle characterizations using a “few-to-many” scale. This scale describes the density of the distinct types of particles encountered. Other organizations’ reports expand on this concept but show previous samples in a tabular format to provide comparative indications of the machine’s condition.
A New Concept for Wear Particle Analysis Reporting
To address the concept of standardizing wear particle analysis reporting, members of ASTM D02 CS96 Subcommittee introduced an enhanced concept that has been published in ASTM STP1634 Standard Guides and Practices that Support the Lubricant Condition Monitoring Industry.
The concept of documenting comparative sample particle characterizations was expanded to include a step to identify the present particle types and characterize six attributes common to each particle type.
The attributes include the particle’s:
- Relative density or concentration of each particle type when compared to other particles being examined.
- Typical observed size
- Maximum observed size
- Texture
- Colour
- Composition
The results for each particle type’s attribute rating are then rolled into a trending tool, which allows the evaluator to monitor for changes in particle attributes and present particle types. These innovative concepts are still under discussion within ASTM.
Particle Counting and the Impact of Digital Imaging
Historical particle counting techniques do not differentiate between hard and soft particles, or particles that are either microscopic water droplets or air bubbles. This lack of detail requires statistical assumptions to be made concerning the level and type of damage that a group of particles may cause. Digital tools that allow measurements of particles can identify and size both water droplets and air bubbles.
 In some cases, such as air entrainment, water emulsion, or foam, the presence and concentration of water droplets or air bubbles may become of greatest interest. In other cases, hard wear metals are of primary concern as they relate to machine condition. In this case, bubbles and droplets can become misleading information. Being able to discount droplets, bubbles, or wear metals from the population makes digital particle analysis more powerful. The use of a photo array makes these decisions possible.
Digital oil particle recognition utilizes two-dimensional arrays of pixels that comprise particles. A camera is used for this measurement and can be either employed:
- From a fixed position over a static group of particles.
- From a dynamic system where a thin layer of particles flows past the camera and are measured as they pass through the array.
The particle characterizations are made at a pixel level through shape and color. The resulting information is organized by applying a series of rules to determine particle attributes and basic overall shapes. Instrumentation is available on the market to digitally measure particles in oil. ASTM standard D7596 is in place to accomplish this.
The next step needed to improve digital data quality is to develop common technology terminology, definitions, and methodology in how pixel information is assigned to particle types. In doing so, the end user can expect a consistent particle characterization regardless of the technology being used. Improving and standardizing the use of digital imaging for wear particle analysis is an ongoing ASTM effort.
ASTM’s D02 committee provides the condition monitoring industry with a voice and place to improve the profession and technology. The D02 CS96 subcommittee manages and authors in-service lubricant condition monitoring standards. The subcommittee’s primary responsibility is to develop standards that promote knowledge and innovation while ensuring that appropriate testing is being performed and that the resulting data is correctly implemented.
Questions about ASTM CS96 Subcommittee may be directed to CS96 Subcommittee Chair, Lisa Williams, at lisa.williams@ametek.com/
ASTM International, a global volunteer-driven standards organization, serves a significant role in today’s condition monitoring industry. ASTM is known for laboratory test methods that provide instruction used to obtain consistent and reliable data. In addition to test methods, ASTM products include Guides and Practices that provide useful “how to” recommendations, some of which include test acceptance and action-level criteria that can be used to enhance the effectiveness of both common maintenance practices and in the use of condition monitoring test data. ASTM is a source of research and innovation that has and will continue to shape the future of the condition monitoring industry.
Acknowledgments
Special thanks to K. Shamabanse, Palo Verde, and T. Canty, Canty Process Technology.
